Usually it’s a good idea to keep these up to date, although occasionally this can cause issues. Some driver updates inadvertently cause bugs or errors, meaning you’ll want to quickly revert to the previous version. Fortunately, there’s an easy way to do this in Windows 10.
How do I roll back a driver?
Open Device Manager. The simplest way is to press Win+X, then M. But you can also search for it in the Start menu. Hopefully you already know which device is causing the problem, otherwise the next step is going to be tricky. There might be a yellow triangle which highlights a problem, but there’s a good chance there won’t be.
If necessary, expand one of the sections and then right-click on the device that’s having issues and click on Properties.
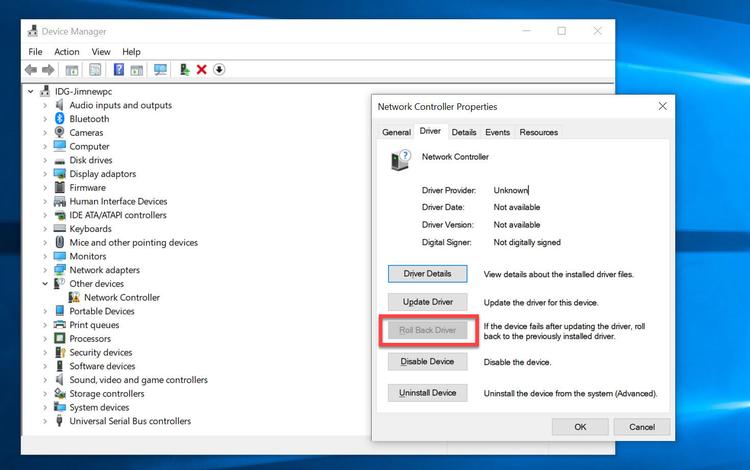
Click on the Driver tab at the top, and then click on the ‘Roll Back Driver’ button. Click OK and the previous driver version should be restored. You may have to reboot your computer.
If the button is greyed out as it is above, the problem is that you don’t have a driver installed for that device, or there is no previous driver to roll back to. You’ll know which of these it is because if there is no driver installed, you’ll see something similar to our screenshot where there is no driver date or version. And if that is the case, you’ll need to download and install the appropriate driver for the device. If your computer is just running slowly, take a look at our guide on how to speed up Windows.