Let’s see how to format and prepare the SSD to use for your Mac Time Machine’s backup with OS X.
How to Format External SSD for Time Machine
Most of the SSDs come in default ExFat format that is compatible with both Windows and Mac. For the time machine, you have to format the SSD from the default shipped format.
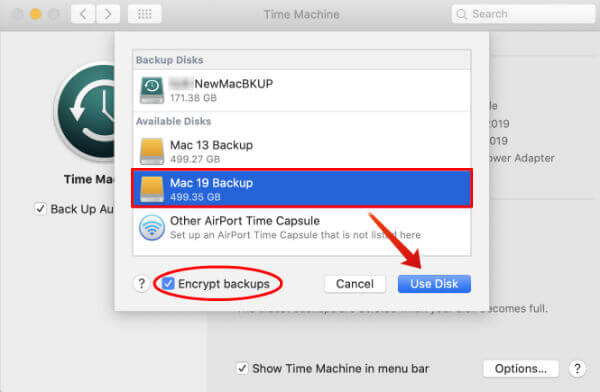
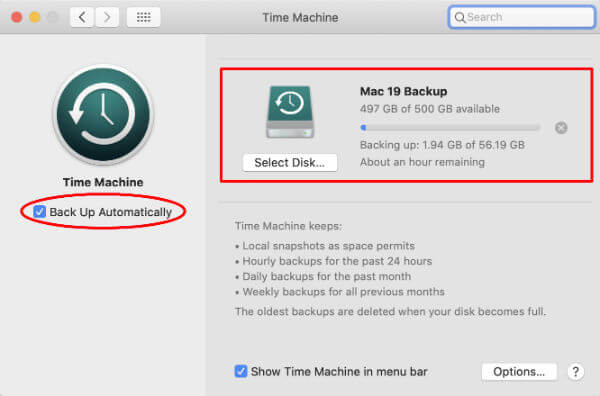
Once you selected the backup machine, the system will consider the disk as Time Machine. Always choose the same disc to Time Machine in the future. Next time, you don’t need to select the drive or start the backup, The entire process is automatic, and the system will start the Time machine and select the same backup disk once you connect the SSD to the Mac. There are some Disk Formatting and Schema selection are followed above the steps, Those who want to know more detail about the Schema and Disc formats available in Mac Disk Utility, please refer below;
Default SSD Format
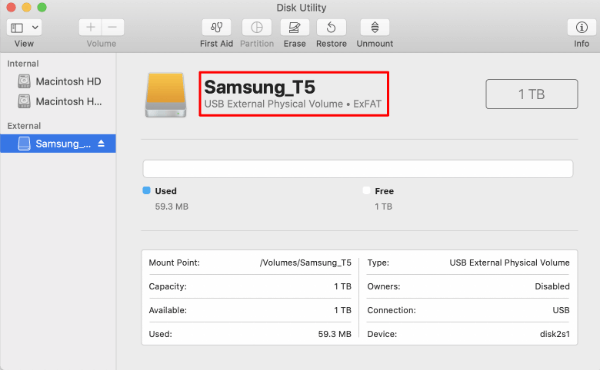
The Samsung SSD comes with ExFat format by default. This is enough to work the SSD as a backup drive for Mac. ExFat is also compatible with Windows too. The SSD will work for both Windows and Mac out of the box. ExFat is an upgraded version for the FAT32 file system that limits the maximum file size to 4GB. You don’t need to format the disk again if you want to use the disk for normal backup with Windows and Mac.
View Settings on Mac Disk Utility
Before you go for disk formatting, you have to change the view settings to see more details of the SSD. Tap on the button on the top left the bar and select “Show All Devices” instead of “Show Only Volumes.” You can see all the devices instead of just volumes. You can select the individual devices and get information in this video mode.
Right Format for SSD
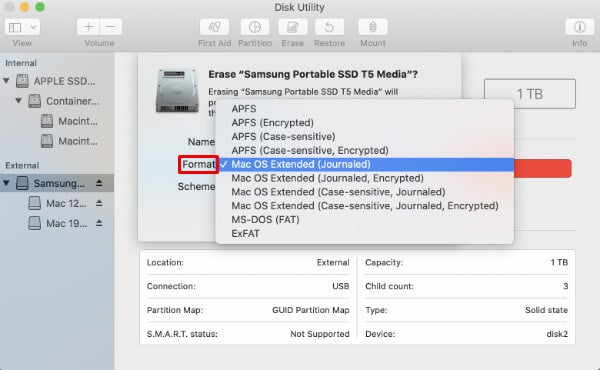
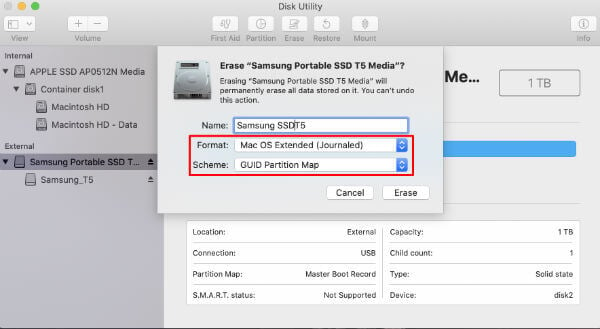
Now let’ come to the Mac backup. The million-dollar question is there are a lot of Disk formats are available and which one you want to select. How do you find out the right format for Time machine backup? Let’s see a few more details about each format. APFS: Apple launched the Apple File System (APFS) in macOS High Sierra. APFS system is fast, offers a quick read and write and efficient. However, Apple won’t support the APFS format for Timemachine. This file system is ideal for data transfer and saving the data direct from Mac, not through the time machine backup. Mac OS Extended (Journaled): “The Mac OS Extended (Journaled) format file system is the default file system for macOS Sierra and earlier. ” The format Apple support for Mac owners for Time machine is Mac OS Extended (Journaled). FAT32: The FAT32 file system (MS-DOS FAT) released in 1977. FAT32 is the cross-platform format for Windows and Mac OS X. The format is good for handling the files between both OS under 4GB size. The USB drivers come with the FAT format by default. ExFat: ExFRat is the upgraded version or FAT32 file system, that supports more than 4GB in a single file. The SSD drives are formatted in ExFat by default to support both Windows and Mac OS X. NTFS: Mac was supporting to read NTFS (New Technology File System) file system in earlier versions, but not supporting to write the file into the NTFS formatted disk. Windows is actively using the NTFS file system to store and retrieve files on the Windows system. Since Apple recommends the Mac OS Extended (Journaled) file system from time machines. You can use the encrypted disk or Case-sensitive for the naming convention.
Right Scheme for SSD
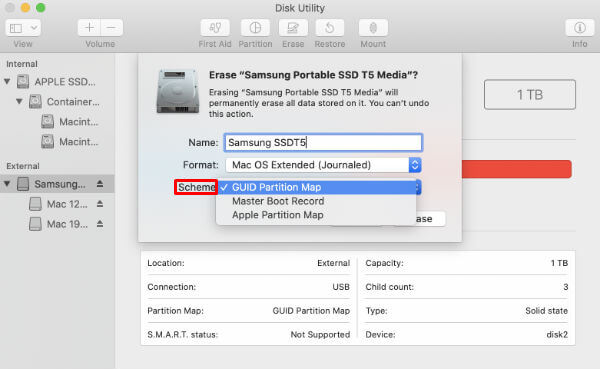
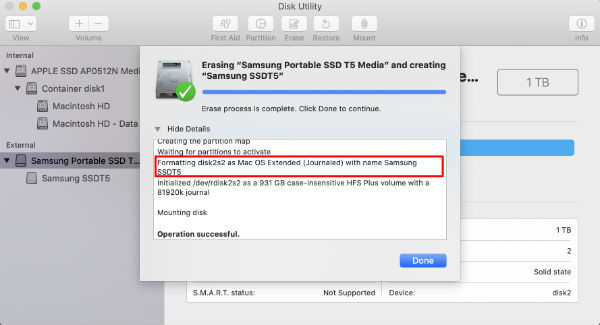
You have to select the right Scheme for the disk partition when you erase the disk. There are three options available to select the scheme and let see some details. GUID Partition Map: This is the usual format used for the non-start up discs in Mac with Intel processor. We are going to select this as the scheme for our disk partition. Just for additional information, the GUID partition can be used as a startup disk for PowerPC based Macs. Apple Partition Map: This used for Mac computers and can be considered as boot-up and non-boot-up for PowerPC macs. Master Boot Record: This is used as a startup disk for DOS and Windows machines. This scheme applies to DOS and Windows-based file systems and formats. As long as you are going to work with Mac OSX, you don’t need to worry about this. Editor’s Note: If you are planning to use this for Windows XP, please be aware that that the GUID Partition scheme can’t recognize by Windows XP 32-bit machines and Maz OS X ver 10.4 or older. This is all you need to format the SSD for Time Machine. You will see a faster backup with the new SSD. The initial backup may be lengthy because it needs to back up the entire disk. The additional backups will be a lot faster with SSD.
Δ